Por: @elip
Publicado em: 2018-10-30
Kea DHCP
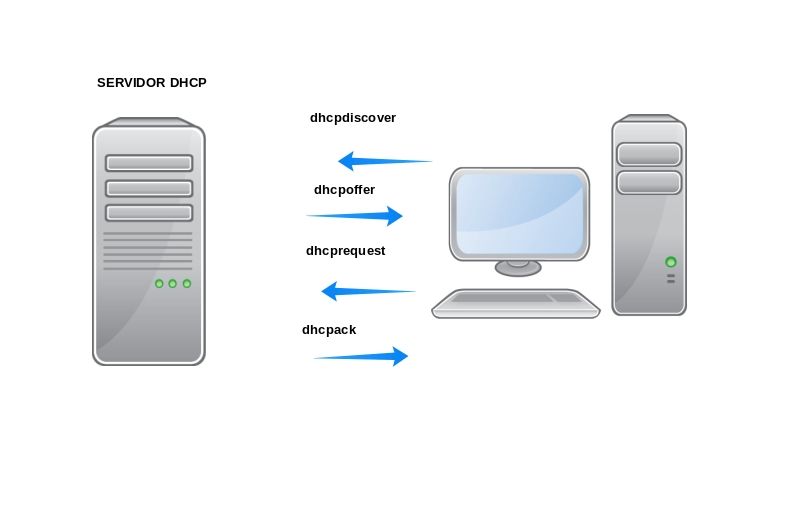
Esse laboratório demonstra o uso do kea DHCP que será o substituto do pacote isc-dhcp. Ele possui muitas melhorias em relação ao isc-dhcp e inicialmente fazia parte do projeto do bind, porém a equipe de desenvolvimento decidiu separar o kea do projeto e seguir seu desenvolvimento separadamente.
Instalando o pacote
yum install epel-repo
yum install kea -y

systemctl enable kea-dhcp4
systemctl start kead-dhcp4
Modelo de configuração Básica
A configuração mínima para que o serviço kea-dhcp4 esteja em funcionamento é a seguinte:
# Arquivo de configuração do servidor kea DHCPV4 e DHCPv6.

{
  "Dhcp4": {

#OBS: AO COMENTAR, SEMPRE COLOQUE O COMENTÁRIO SEM NENHUMA INDENTAÇÃO.
#SE HOUVER INDENTAÇÃO O SERVIÇO QUEBRA.
# Define em qual interface de o kea-dhcp4 irá ouvir.
# Se houver mais de um pool de endereços, nos nomes
# das interfaces devem ser separados por vírgulas


    "interfaces-config": {
        "interfaces": [ "lan0" ]
    },

# Define onde serão armazenados os leases
# O default é "memfile"
# Se "persist" for false, o lease não será escrito no arquivo
# ao reiniciar o serviço kea-dhcp4, o IPs serão redistribuídos
#
# "name" define a localização do arquivo de leases
# lfc-interval define um tempo para limpar o arquivo de leases
# isso evita que haja registros duplicados no arquivo

    "lease-database": {
        "type": "memfile",
        "persist": true,
        "name": "/var/lib/kea/kea-releases4.csv",
        "lfc-interval": 3600
    },
    "valid-lifetime":4000,
# Define o pool de endereços para distribuição

    "subnet4": [
    { "subnet": "192.168.10.0/24",
        "pools":[{
            "pool": "192.168.10.2 - 192.168.10.50"}]}
    ],

# Define dados opcionais

    "option-data":[
        {
# Informa quais são os servidores DNS
                "name": "domain-name-servers",
                "data": "8.8.8.8, 8.8.4.4"

        },
# Define qual será o gateway
        {
                "name": "routers",
                "data": "192.168.10.1"
        }
    ]
  }
}
Laboratório 1 - Configurando KEA com MySQL
# yum install mariadb-server -y

# systemctl enable mariadb

# systemctl start mariadb

# mysql_secure_installation

NOTE: RUNNING ALL PARTS OF THIS SCRIPT IS RECOMMENDED FOR ALL MariaDB
      SERVERS IN PRODUCTION USE!  PLEASE READ EACH STEP CAREFULLY!

In order to log into MariaDB to secure it, we'll need the current
password for the root user.  If you've just installed MariaDB, and
you haven't set the root password yet, the password will be blank,
so you should just press enter here.

Enter current password for root (enter for none): ### Enter
OK, successfully used password, moving on...

Setting the root password ensures that nobody can log into the MariaDB
root user without the proper authorisation.

Set root password? [Y/n] y
New password:  ### setar a senha
Re-enter new password: ### setar a senha
Password updated successfully!
Reloading privilege tables..
  ... Success!


By default, a MariaDB installation has an anonymous user, allowing anyone
to log into MariaDB without having to have a user account created for
them.  This is intended only for testing, and to make the installation
go a bit smoother.  You should remove them before moving into a
production environment.

Remove anonymous users? [Y/n] y
  ... Success!

Normally, root should only be allowed to connect from 'localhost'.  This
ensures that someone cannot guess at the root password from the network.

Disallow root login remotely? [Y/n] n
  ... skipping.

By default, MariaDB comes with a database named 'test' that anyone can
access.  This is also intended only for testing, and should be removed
before moving into a production environment.

Remove test database and access to it? [Y/n] y
  - Dropping test database...
  ... Success!
  - Removing privileges on test database...
  ... Success!

Reloading the privilege tables will ensure that all changes made so far
will take effect immediately.

Reload privilege tables now? [Y/n] y
  ... Success!

Cleaning up...

All done!  If you've completed all of the above steps, your MariaDB
installation should now be secure.

Thanks for using MariaDB!
Configuração do kea-dhcp:
{
"Dhcp4": {
      "option-data":[
            {
              “name”: “domain-name-servers”,
              “data”: “192.168.47.254”
            }
        ],
    "interfaces-config": {
            "interfaces": [ "enp0s3" ],
            "dhcp-socket-type": "raw"},
    "lease-database": {
          "type": "mysql",
          "host": "localhost",
          "name": "keadata",
          "user": "kea",
        "password": "kea"
      },
    "valid-lifetime": 4000,
  "renew-timer": 1000,
  "rebind-timer":2000, "host-reservation-identifiers":["circuit-id","hw-address","duid","client-id"],
    "subnet4": [{
      "subnet": "192.168.0.1/24",
        "pools": [ { "pool": "192.168.0.2-192.168.0.20" } ],

        "reservation-mode":"all"
    }]}
}
Laboratório 2 - Configuração Kea DHCP com TFP
# Arquivo de configuração do servidor kea DHCPV4 e DHCPv6.

{
"Dhcp4": {
# Aponta para um servidor TFTP
  "next-server": "192.0.10.123",
  "boot-file-name": "/dev/null",

  "interfaces-config": {
        "interfaces": [ "lan0" ]
    },

    "lease-database": {
        "type": "memfile",
        "persist": true,
        "name": "/var/lib/kea/kea-releases4.csv",
        "lfc-interval": 3600
    },
    "valid-lifetime":4000,
# Define o pool de endereços para distribuição

    "subnet4": [
    { "subnet": "192.168.10.0/24",
        "pools":[{
            "pool": "192.168.10.2 - 192.168.10.50"}]}
    ],

# Define dados opcionais

    "option-data":[
        {
# Informa quais são os servidores DNS
                "name": "domain-name-servers",
                "data": "8.8.8.8, 8.8.4.4"

        },
# Define qual será o gateway
        {
                "name": "routers",
                "data": "192.168.10.1"
        }
    ]
  }
}
Links relacionados
- https://docs.google.com/document/d/1Y7yDDYlVwAV520C9YBiCzqLx3jBHbDo43BskDcV5E2Q/edit?usp=sharing
- https://kb.isc.org/category/210/0/10/Software-Products/Kea/Knowledge-Articles/
- https://kea.isc.org/wiki/Install
- https://kb.isc.org/getAttach/126/AA-01381/KeaQSG.pdf
Observações importantes
- keactrl não gerencia corretamente os daemons kea-dhcp4, kea-dhcp6 e kea-ddns. Então deve ser usado os comandos do systemd em cada módulo.
- Comentários com identação quebram o serviço
Concluindo
O kea dhcp é o substituto natural do isc-dhcp e em breve irá substituí lo. A sua configuração parece um pouco mais complicada mas basta se acostumar com a syntaxe da sua configuração e ela fornece uma API para manipular a concessão de leases.